Lesson content to teach ESL online (part 1)

We’ve been releasing lesson content designed for ESL teachers to run their own private lessons. In this two-part post we will show you how our content will save you hours in prep time.

For this post we will use our Ed-Ing-1 lesson plan. Our Ed-Ing lesson plan is designed to teach students the difference between -ed and -ing adjectives. Our current library of lesson content covers Grammar (Verbs, Nouns, Adjectives), Vocabulary and Phonics.
If you would like access to our lesson content library, request an account on our Home page.

All of our lesson content comes with adjoining Teacher Notes. The notes move slide by slide as you move through the lesson content.

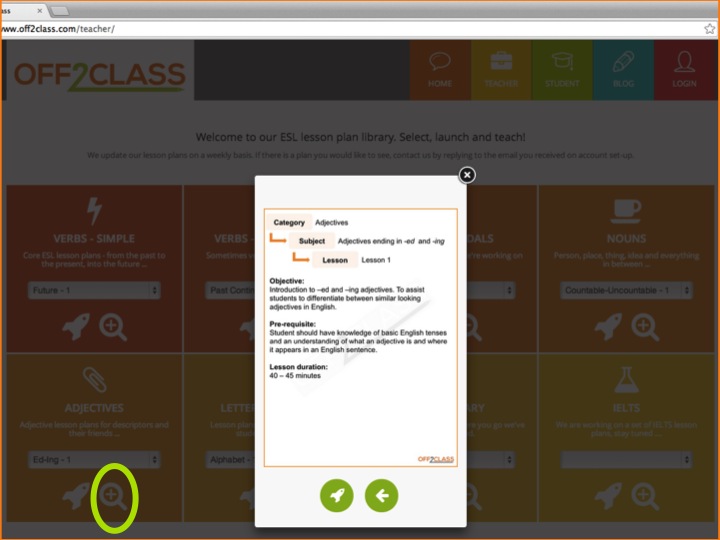
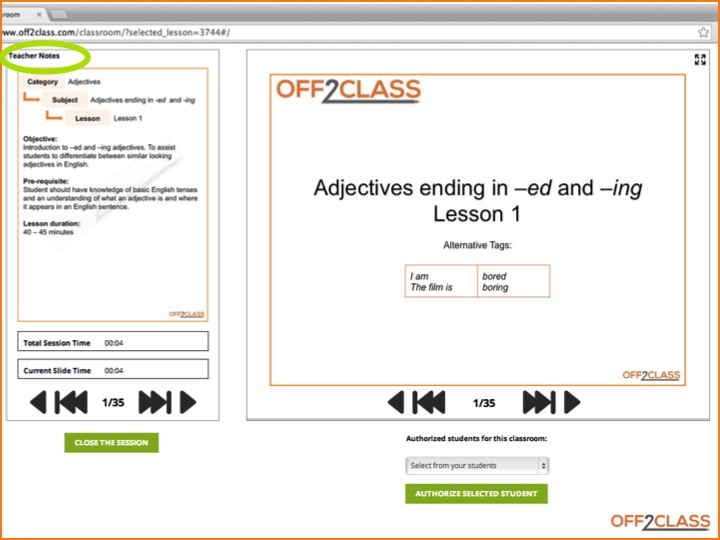
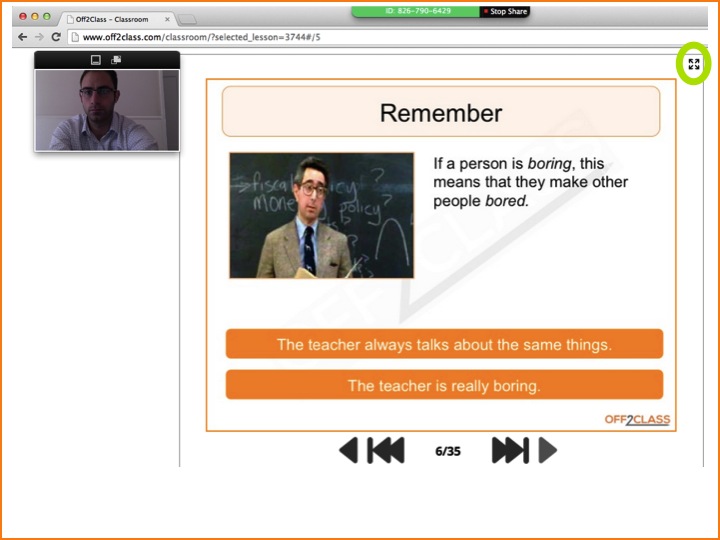
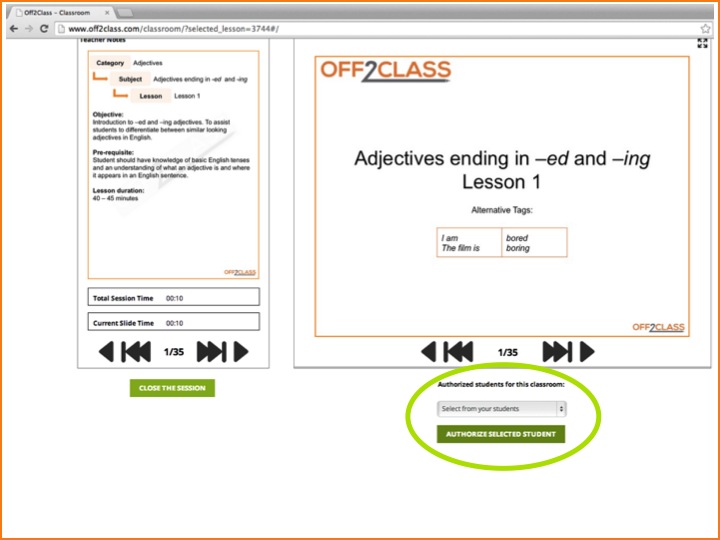
The purpose of our Teacher Notes is to reduce your prep time. Each set of Teacher Notes begins with a summary page where we describe the objectives, prerequisites, things to watch out for (i.e. “remember”) and a suggested duration of the lesson. You can access the summary page either while browsing through our library on the Teacher Tab (click on the preview lesson button) or once you’ve launched a lesson (on the left of your screen):
Teach ESL Online Teach ESL Online
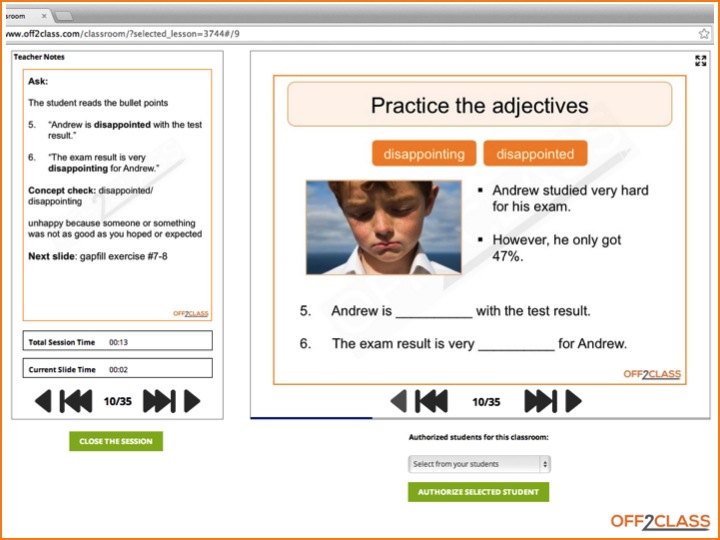
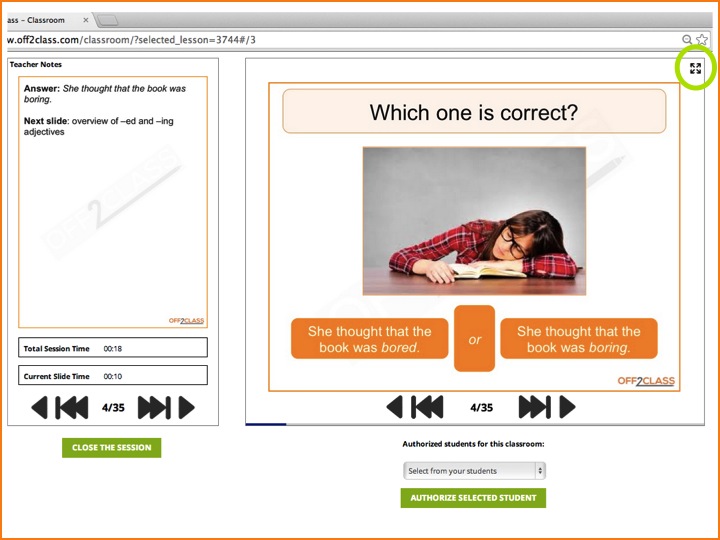
Once you click past the first page of the lesson content, the Teacher Notes move sequentially with the lesson content. Each Student Slide is matched to a Teacher Note that provides suggestions on how to use the lesson content. If the slide is an exercise, we provide the answers or examples of the target language in the adjoining Teacher Note:
screen#3
Prior to teaching the lesson, we recommend browsing through the Student Slides and Teacher Notes. This allows you a high-level understanding of the objectives, activities and exercises in the lesson content.
For Ed-Ing-1 the lesson flow is as follows:

  • Warm-up comparison of adjectives ending in -ed and -ing
  • Grammar explanation: differentiating -ed and -ing adjectives
  • Warm-up exercises – picking the correct adjective
  • Grammar explanation and use of look/feel/taste/smell with -ed and -ing adjectives
  • Controlled practice – gapfill exercises
  • Free practice – make your own sentences

Ready to teach? Launch your lesson content!

Now that you have browsed the Student Slides and Teacher Notes, launch your lesson content. You have several options on how to run your lesson. Our system accommodates various learning environments:

Teaching Online

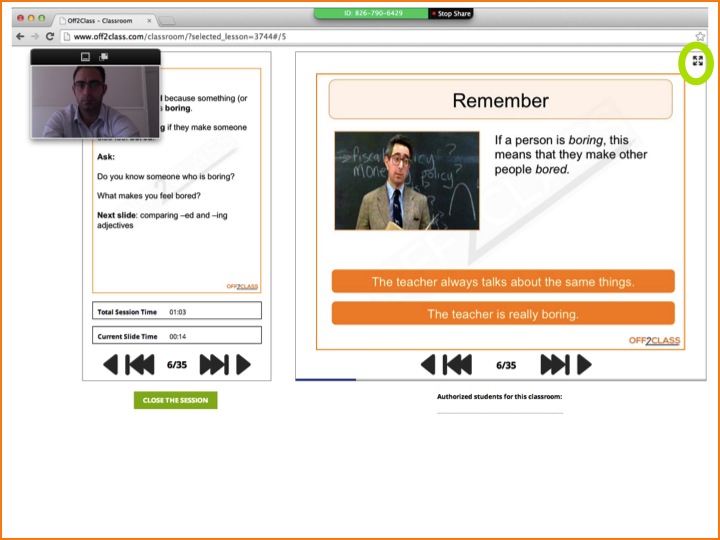
Regardless of the video-conferencing system you prefer (Skype/Google Hangouts/WizIQ/Zoom), our lesson content is a powerful tool when you share your screen:

  • After launching your lesson content, hit the full screen button (circled in green below), which hides your Teacher Notes. Only the Student Slides will be visible
  • Share the screen using your video-conferencing software
  • If you need to view the Teacher Notes during your lesson, you can toggle back to the Teacher Notes by clicking the full screen button (if you do not want your student to see the Teacher Notes, be sure to stop your screen share prior to toggling back)

Slide1 Slide2
If you would like to view your complete set of Teacher Notes while teaching your Student Slides (without the need to toggle back and forth using the full screen button) your student can follow along to your lesson from their own account:

  • Set up student accounts by adding them on your Profile page
  • Authorize students to join the classroom once you’ve launched your lesson content
  • Students then follow the lesson content by going to the Student tab on their computers – the student’s view moves automatically as the teacher advances through the Student Slides
  • When you shut down the lesson content, your student will be removed from the classroom. When you launch a new lesson and authorize your student to join, they will then be invited to re-join the newly loaded lesson content

Slide1Slide1student-join

Offline Teaching (one-on-one)

If you are teaching a single student in person, one of the simplest ways to teach is to just share your device (laptop/tablet) with your student:

  • Physically share your laptop with your student
  • Hide the Teacher Notes by clicking the full screen button (circled in green below)
  • Go back and review a note by clicking on the full screen button again

Please Note: if your student does not have a reliable internet connection, you can pre-load the lessons in your browser at home (no live WIFI connection needed during the class)
Slide1 Slide2

Offline Teaching (group)

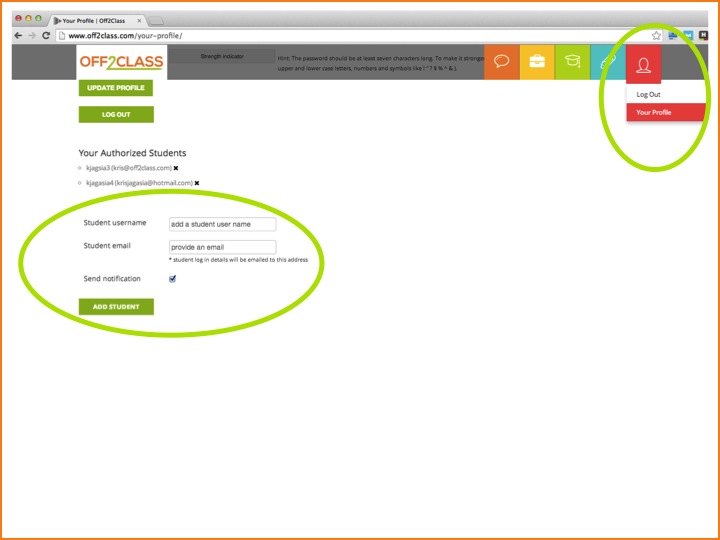
If you are teaching a group of students you can use a projector or have them each follow using their own devices. For either set up, you will have to set up student accounts:

  • Set up student accounts by adding them on your Profile page
  • Authorize students to join the classroom once you’ve launched your lesson content
  • Students then follow by going to the Student tab on their devices – the student’s view moves automatically as the teacher advances through the Student Slides
  • For a projector, consider using two devices (preferably, a tablet and a laptop). Run your lesson content from the tablet. Use the laptop (connected to the projector) to display the student view.

Slide1 student-join

In Part Two of this post, we will give you some great teaching strategies for our lesson content.


No comments

Leave a reply

Your email is never published nor shared. Required fields are marked *